
Craft Projects From Old Neck Ties
Turn abandoned ties into bags, wristlets, bracelets, home accents, and pieced waistcoats—fabric upcycling with prep tips for silk and polyester.
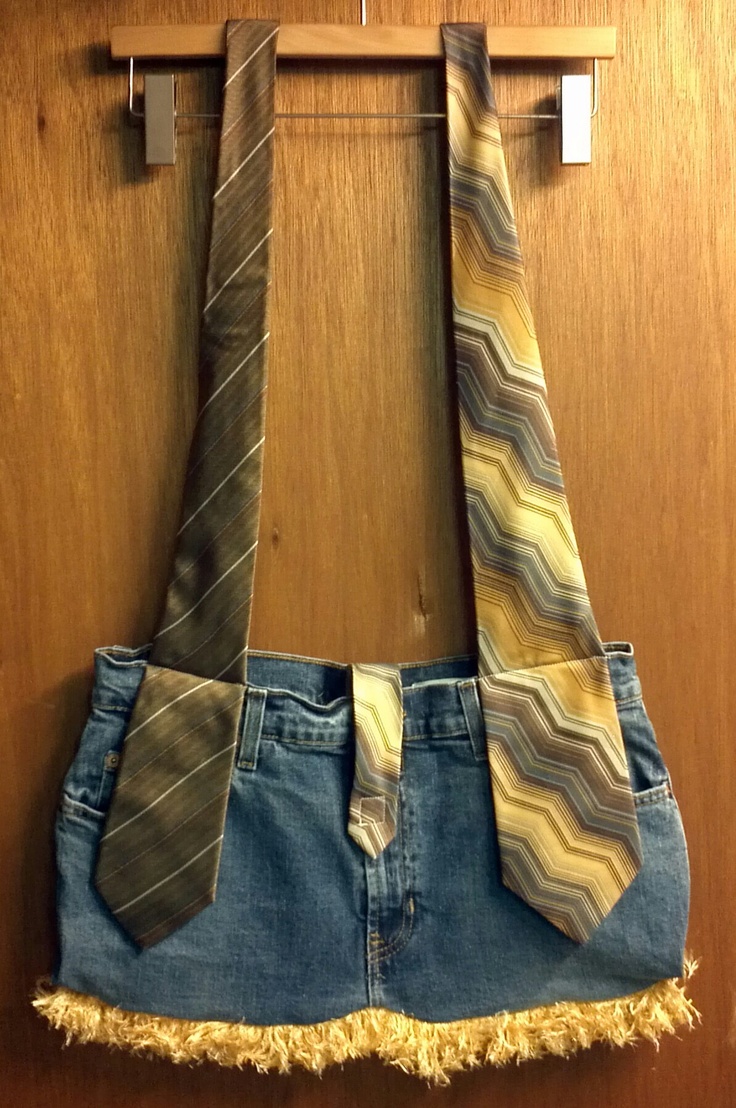
Old neckties are narrow lengths of patterned silk, polyester, or wool that already know how to drape. That makes them unusually good craft raw material: bias-cut fabric with finished edges, built-in color stories, and a length that wants to become straps, bindings, and pieced panels. Before you donate another abandoned tie rack, look at what the fabric can become—bags, bracelets, soft jewelry, chair accents, even a playful waistcoat assembled from many ties sewn edge to edge.
This is fabric upcycling, not holiday paper craft and not bedroom styling. You are cutting and sewing (or no-sew knotting) a specific garment into smaller useful objects. Silk snags differently than polyester; wool frays differently than microfiber. Sort ties by fiber and washability before you commit a favorite pattern to scissors, and keep one pristine tie uncut if it still has emotional or formal value.
Prep: open, press, and plan
Most ties are constructed as a tube with interfacing and a keeper loop. Open the back seam carefully with a seam ripper, remove the label and interfacing if it fights your plan, and press the fabric flat on a low-to-medium iron with a press cloth—especially on silk. Keep the pointed tip intact when a project wants a natural finish; clutch flaps and bracelet ends love that shape. Save the long skinny neck for straps, rolled cords, and binding.
Sketch the finished object at roughly 1:1 on paper. Ties are narrower than quilt scraps; piecing multiple ties is how you get bag bodies and vest fronts. Aim for odd numbers of coordinated patterns so the mix looks curated rather than chaotic. Solids next to busy prints give the eye a rest. Lay candidates on a table in daylight before cutting; artificial light hides clashes you will regret later.
Fiber test: dampen a scrap corner. Silk often needs gentle handling and may water-spot; polyester shrugs off more abuse and suits beginners. Wool blends can felt or shrink—pre-test if the finished piece will meet rain or laundry.
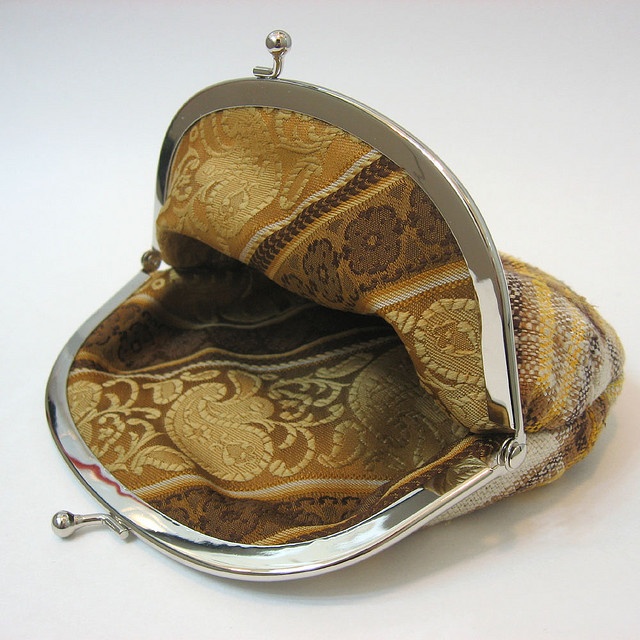
Bags and purses from pieced ties
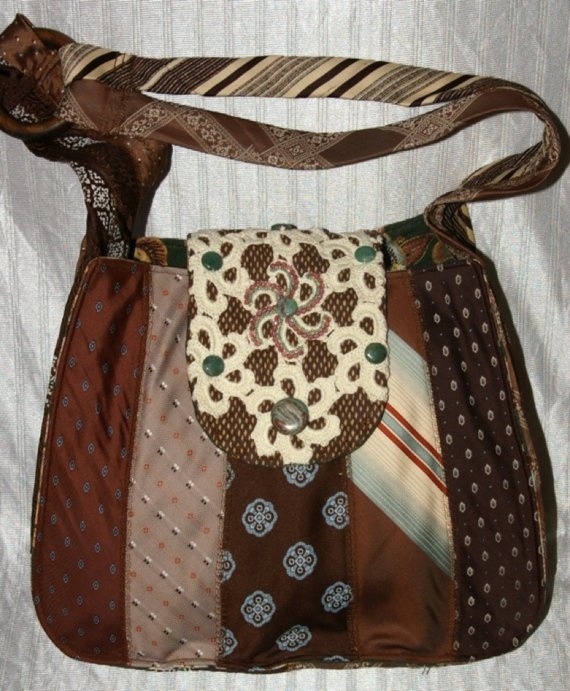
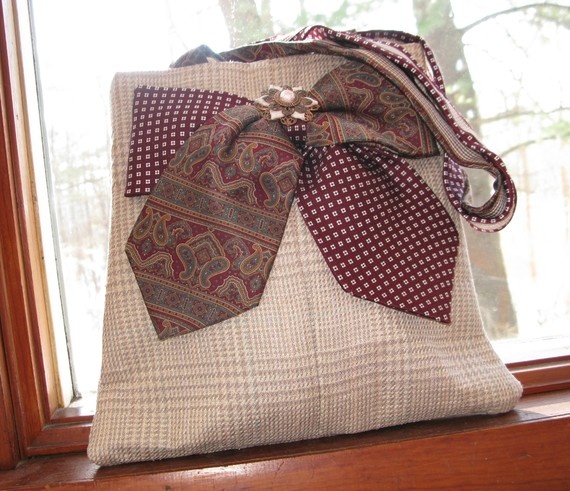
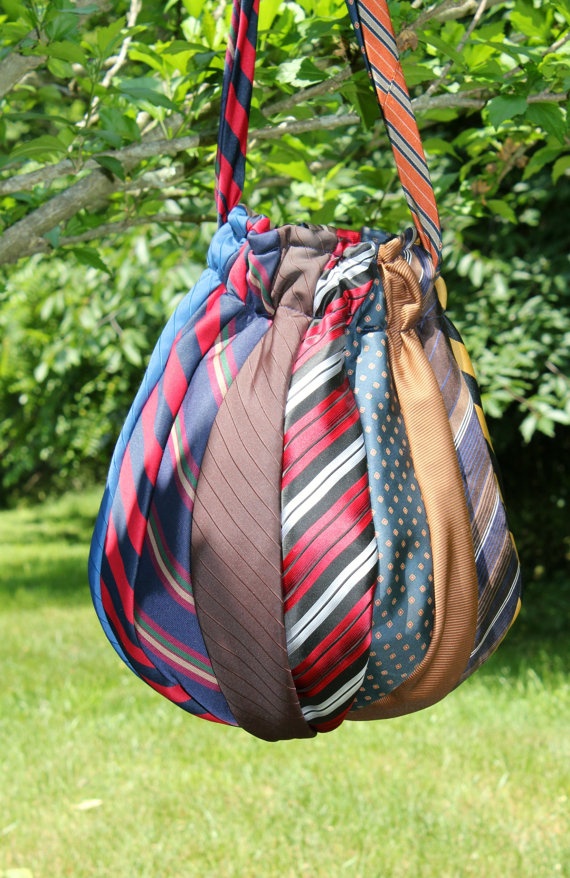
A classic tie bag sews opened ties into a rectangle or diamond patchwork, then adds a lining and a strap cut from another tie or from leftover necks. Decorative purses lean showy: pointed tips become petals or fringe along a flap. For everyday use, choose denser weaves and add a sturdy zipper or magnetic snap. Interfacing the pieced shell keeps silk from collapsing into a sad pouch.
Construction order that saves tears: piece the exterior, fuse light interfacing, sew the lining bag separately, then nest and finish the top edge. Press every seam. Tie fabrics are slippery; clips often beat pins. If you are newer to sewing, start with a flat zip pouch before a shaped handbag with curves and boxed corners.
Strap comfort matters. A single skinny neck can dig into a shoulder; fold and stitch two necks together, or pad with a strip of cotton. Reinforce strap joins with a square of extra fabric so daily weight does not rip the pieced shell at the stress point.
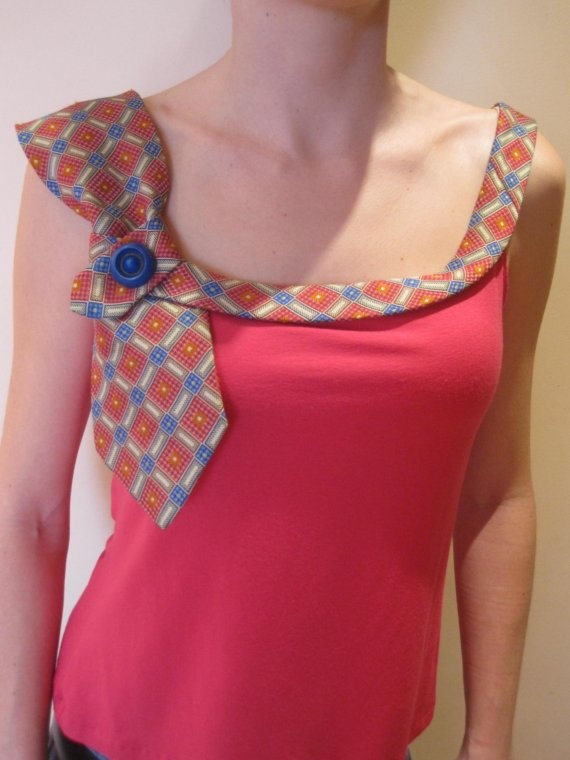
Wristlets, card cases, and small carry
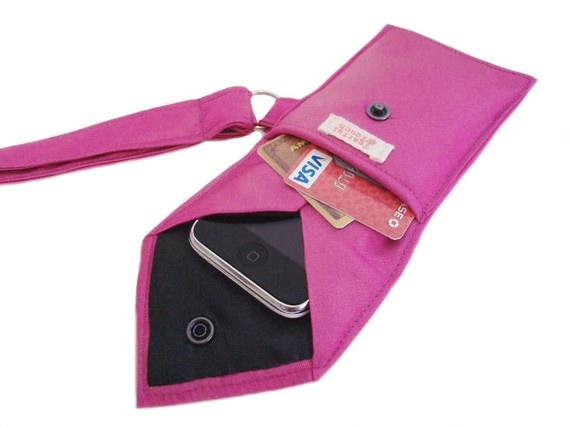
A single wide tie section can wrap a phone or a slim card stack when folded and stitched into a sleeve, then finished with a wrist strap from the narrow end. These small projects teach grain and seam allowances without wasting a whole wardrobe. Add a button or snap so the wrap stays shut in a bag. Measure the device with a little ease—tight silk stretches poorly and can pop stitches.
Keep hardware light. Heavy metal rings can tear silk overnight. If the fabric is fragile, line every high-friction edge. Polyester ties forgive beginners; vintage silk rewards careful hands and a fresh needle. A microtex needle and shorter stitch length help on fine weaves.
Card wristlets make fast gifts: one evening, one tie, one snap. Photograph the pattern before sewing if you want to recreate a popular mix for friends.
Bracelets, cuffs, and soft jewelry
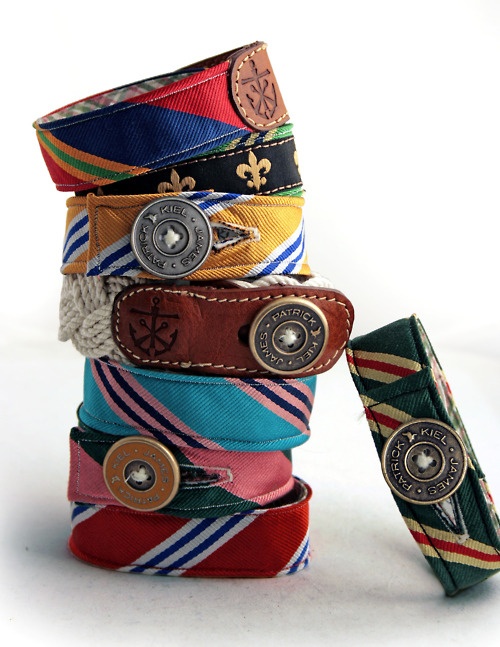
Bracelets are the fastest win. Fold a short segment lengthwise, stitch or glue the long edge, turn if needed, and close with a snap, button, or tie-on tails. Stack thin bracelets from different ties for a striped cuff look. For a wider cuff, fuse two layers and topstitch channels so the band keeps shape on the wrist.
No-sew options exist for non-silk fibers: wrap and knot, or braid three skinny necks. Test skin comfort—scratchy wool may need a soft lining strip. Kids’ versions should avoid small snaps that can detach; sew secure buttons or use longer tie-on ends.
These pieces are ideal for using leftovers from bag projects so almost nothing hits the trash. A jar of leftover tips becomes a jewelry kit for rainy afternoons.
Home accents: pillows and chair ties
Beyond wearable crafts, opened ties piece into pillow fronts with surprising polish—especially when patterns share a color family. A lumbar pillow needs fewer ties than a large square. Insert a zip or envelope back so the cover washes separately from the insert. For furniture, a single sturdy tie can become a chair sash or curtain tie-back: little sewing, instant pattern. Avoid silk on chairs that see daily abrasion; save delicate prints for display pillows.
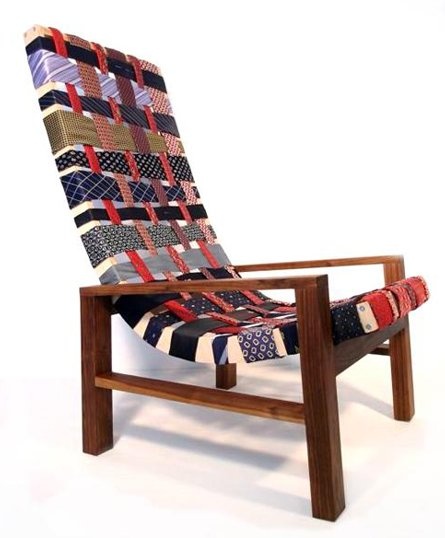
Upholstery-scale projects—recovering a whole seat in ties—are advanced and glue- or staple-heavy. They look striking in photos and demand even tension so the seat does not ripple. Practice on a footstool before a dining chair you actually use. Always check that adhesives are compatible with the fabric; some solvents mark silk permanently.
Waistcoats and garments from many ties
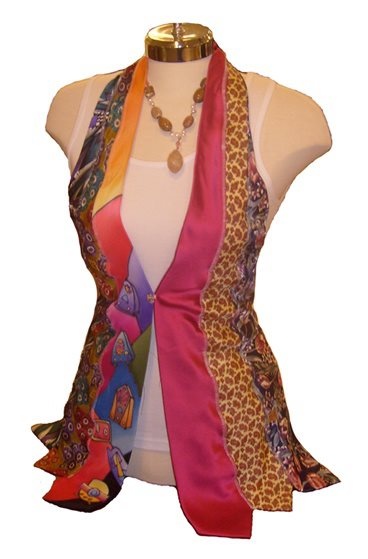
A waistcoat or vest pieced from neckties is the ambition project in this set. You need a simple vest pattern, enough ties to cover the fronts (backs can be plain lining fabric), and patience for matching points. Press seams open, stay-stitch curves, and interface the fronts so the collage hangs like clothing rather than a quilt costume. Closures can be buttons covered in leftover tip fabric for a coordinated finish.
Fit matters more than novelty. Make a muslin of the vest first. Then treat ties as stripes or chevrons depending on how you angle the seams. Keep heavier polyester away from areas that need soft drape; mix weights carefully so one shoulder does not pull. The result is conversation-level fashion built from closet orphans—high effort, high payoff, and a clear cousin to the smaller bag and bracelet ideas rather than a separate hobby.
If a full vest feels too far, try a tie-pieced pocket square panel or a belt of folded necks first. Skill ladders beat abandoned masterpieces.
Practical notes before you cut
- Wash and dry test a scrap if the finished item will meet rain or sweat.
- Use a microtex or fine needle on silk; change needles often.
- Clip curves and grade seams so points stay sharp.
- Store leftover necks in a jar—they become future straps and bows.
- Photograph pattern layouts before sewing if you need to recreate a mix.
- Keep seam rippers friendly: one wrong cut on a rare print hurts more than on cotton quilting scraps.
Pick one object that matches your skill today: a bracelet tonight, a lined zip pouch this weekend, a pieced vest when you have a clear Saturday series. The tie rack gets shorter either way—and the patterns finally leave the closet for something you will actually use.

Comments
Continue reading
DIY T-Shirt Redesign Tutorials: Knot, Fringe, Dye, Appliqué, Paint
Step-by-step methods for knotted crops, fringe, iron-on appliqué, ombré dye, lace inserts, galaxy spray, and painted patterns—plus order of work and care tips.
6 Easy DIY Shoe Makeovers: Polka Dots, Canvas Paint, and Glitter Stripes
Six DIY shoe makeovers—painted refresh, pink polka dots, walking-shoe accents, canvas slip-ons, bibliophile party heels, and jailhouse-stripe glitter.
10 Clever Kitchen Lifehacks for Storage, Prep, and Everyday Order
Magazine-file foil storage, hanger-clip bag seals, lid rods, scrap bowls, chalkboard conversions, and more—ten practical kitchen organization lifehacks.