
50 Washi Tape DIY Ideas: Desk, Décor, Storage, Gifts, and Stationery
Practical washi tape projects—tech and cables, walls and frames, jars and labels, gift wrap, planners, and small furniture accents.
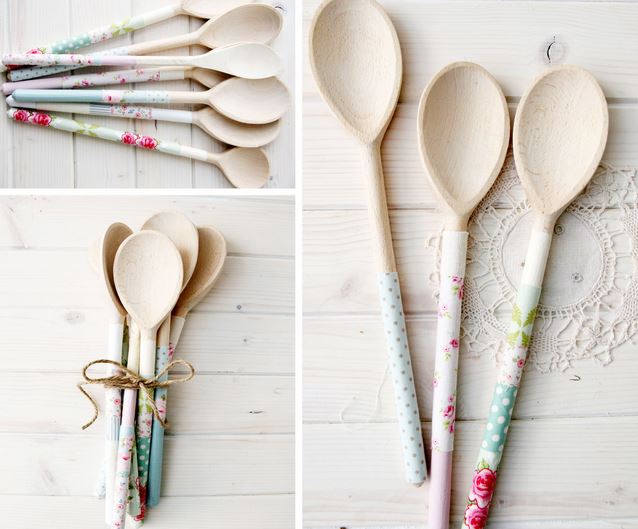
Washi tape is thin, patterned, and low-commitment—the rare craft supply that lets you change a look in minutes and peel it off later if you change your mind. Made from Japanese paper (traditionally) and a gentle adhesive, it sticks to notebooks, walls, jars, chargers, and frames without the aggression of duct tape or the permanence of paint. A handful of rolls costs less than most single décor purchases and unlocks dozens of small upgrades around a desk, kitchen, or gift-wrapping table.
The projects below are practical, not precious. Use them as a menu: personalize tech and stationery, dress up storage, mark cables, frame photos, wrap gifts, and organize without buying a new product every time you want a color shift. Keep a small tin of favorites so you are not hunting through a craft drawer for the one stripe that matches.
What makes washi tape worth a drawer of its own
Good washi tears cleanly by hand, layers without immediate bulk, and releases with less wall damage than standard masking tape—though you should still test a discreet corner on painted walls and delicate finishes. Patterns range from solids and dots to florals, geometrics, seasonal motifs, and metallic foils. Widths matter: skinny rolls outline edges; wider rolls cover phone cases and jar bands faster.
Buy a mix, not fifty near-identical florals. A neutral set (kraft, black, white, gold), a bright set, and one seasonal pack will cover most needs. Store rolls upright in a shallow box or on a peg so edges do not crush. If adhesive weakens after years of dust, press firmly with a bone folder or credit card when you apply—heat from your hands helps a little, but ancient dry tape may simply need replacing.
Desk, tech, and everyday objects
Phone cases, tablet edges, laptop lids (avoid vents and rubber feet), chargers, and keyboard wrist rests all take washi well. Wrap a charger brick in a distinctive pattern so it never gets mixed up at a shared outlet. Stripe a plain pencil cup. Flag the spine of a planner with color-coded months. Label USB drives with tiny washi flags written over in fine pen.
Cable management becomes less ugly when each cord wears a different band near the plug. Match patterns to rooms—kitchen cables get food motifs, office cables get solids—so you grab the right brick without tracing the whole snake under the desk. On remotes and game controllers, a strip of washi can mark “kids’ controller” versus “guest” without permanent stickers.
Keep tape off silicone buttons and charging ports. If a case is heavily textured, burnish the tape down or choose a smoother case for decoration. Matte washi photographs better than ultra-gloss foils under harsh desk lamps.
Walls, frames, and temporary décor
Rental-friendly gallery looks are washi’s quiet superpower. Create faux frames around prints taped lightly to the wall, or run a thin border under a shelf as a color underline. Make temporary wall calendars on poster board with washi grid lines you can rebuild each month. Outline a mirror or corkboard with a contrasting pattern to wake up a bland hallway.
Photo frames from thrift stores transform with taped edges, corner accents, or full wrap-and-burnish treatments on flat wooden fronts. Remove glass first so you do not trap dust under tape on the pane. For kids’ rooms, washi growth charts on poster paper beat paint when tastes change every semester.
Always test painted walls. Fresh paint and delicate wallpaper can lift. If you decorate for a party, remove tape within a few days rather than leaving it through a humid summer.
Storage, jars, and kitchen labels
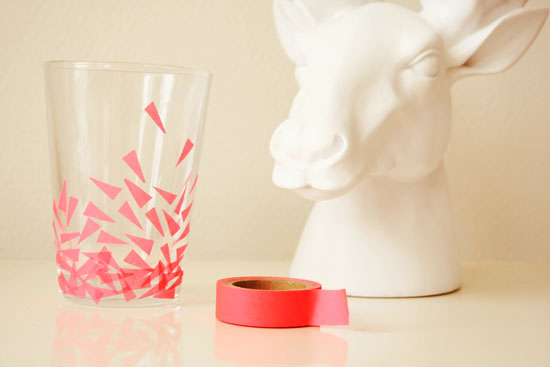
Glass jars, tins, and shoeboxes become a matching set when you stripe lids or wrap mid-bands in coordinated rolls. Write contents on the tape with a permanent fine marker, or stick a small paper label on top of a washi field so you can update names without peeling the décor layer. Spice jars, tea tins, and baking-supply canisters look intentional in a shared pattern family.
Drawer dividers cut from cardboard get a washi skin so they look less like scrap. File folders and magazine holders take spine stripes that make a bookshelf readable from across the room. Laundry room bottles—stained and utilitarian—feel calmer with matching neck bands and handwritten titles.
Avoid the dishwasher, soaking sinks, and oily stovetop splash zones. Washi is paper; water is its enemy. For true wet areas, treat decorations as temporary and replace when edges curl.
Gifts, cards, and party details
Washi turns plain kraft wrap into custom packaging in seconds: border a box face, make faux ribbon with crossed strips, or seal tissue with a patterned belly band. Layer two widths for depth. Tags cut from cardstock get washi borders and punched holes for twine. On envelopes, a washi seal looks more festive than a plain sticker and still opens cleanly for the recipient.
Cards benefit from washi stripes, washi washi-washes (overlapping translucent layers), and tiny flags as page accents in scrapbooks. Party straw flags, cup belly bands, and napkin rings are quick wins for birthdays and showers. For holidays, keep a dedicated seasonal pouch so December’s reds do not migrate into July desk projects.
If you ship packages, reinforce washi with clear packing tape over stress points—decorative tape alone is not structural tape.
Stationery systems and paper crafts
Bullet journals and planners are the native habitat of washi. Use it for headers, habit-tracker borders, weekly spreads, and temporary tabs. Because it peels, you can rearrange a layout without destroying the page—something markers cannot offer. Keep a “working set” of five rolls clipped to the planner so you do not derail a planning session searching for the right polka dot.
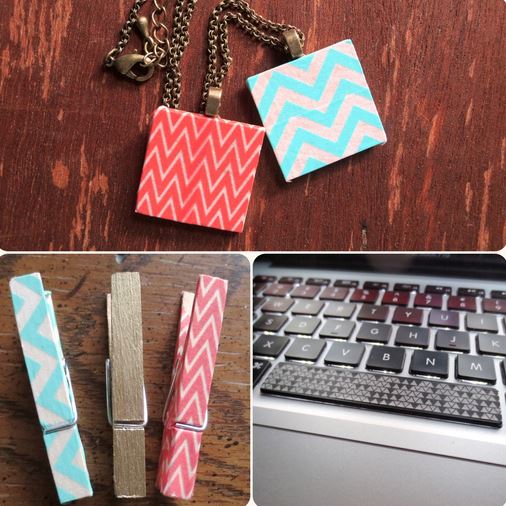
Bookmark strips, collaged postcards, decorated notebooks, and washi-covered clothespins for photo displays all scale to leftover scraps. Teach kids to decorate pencil boxes and lunch notes; the low stakes make creativity less scary than paint. For scrapbooks, washi can hinge memorabilia lightly so nothing is glued forever.
When layering, apply wider base strips first and thinner accents on top. Burnish gently. If a roll sheds adhesive threads, trim with scissors instead of tearing for cleaner edges on photos.
Furniture accents and small DIY upgrades
Drawer pulls can wear washi under a clear sealer for a temporary custom look—know that wear will show on high-touch pieces. Lampshade edges, plain switch plates (power off first; keep tape off screw threads and away from heat), and the outside of a boring storage ottoman can take careful bands. Think accent, not full reupholstery.
Plant pots—ceramic and plastic—look cheerful with geometric washi patterns above the soil line. Keep tape off wet saucers. On bookshelves, washi can color-code genres on dust jackets you do not mind marking, or on removable spine flags.
Respect heat, moisture, and friction. Washi near radiators, candles, or oven doors will fail. High-traffic chair backs will peel. Choose projects where a refresh every few months is acceptable, or seal with a compatible clear coat only after testing on a scrap.
A simple kit and a few habits
Build a washi kit: scissors dedicated to tape (adhesive ruins sewing shears), a bone folder or scrap card for burnishing, a fine permanent pen, a pencil, and a small ruler. Add a mini notebook of combinations that worked—gold-plus-navy on kraft, pastel set on white jars—so future you does not reinvent the wheel.
Batch projects. An hour of jar lids or cable flags beats interrupting dinner prep for one lonely tin. Photograph finished sets if you like sharing or remembering what you used; patterns go out of production and matching later becomes a scavenger hunt.
Washi tape will not renovate a house. It will, however, make the objects you already own feel chosen instead of default. Start with one charger, one jar set, or one stack of envelopes. Once you see how little effort a stripe takes, the rest of the house starts volunteering for a turn.

Comments
Continue reading
DIY Ideas for Old Socks: Rugs, Puppets, Mittens, and More
Sort leftover socks by fiber, then turn them into braided rugs, hand puppets, soft toys, mittens, and pin cushions with practical cutting and sewing tips.
DIY Ideas with Lace Doilies
Upcycle heirloom lace doilies into framed art, runners, pillows, lamps, and more—practical craft projects that keep the crochet visible.
Toilet Paper Roll Crafts: Organizers, Toys, and Ornaments
Cardboard tubes become pencil holders, wreaths, cord cubbies, monsters, race cars, ornaments, and more—structural DIY distinct from magazine-page crafts.