
Washing Machine Drum Upcycles: Fire Pits, Tables, Lights, Planters
Practical drum projects with real safety notes on sharp edges, rust, wiring, and fire—plus when salvaging a drum is not worth DIY.
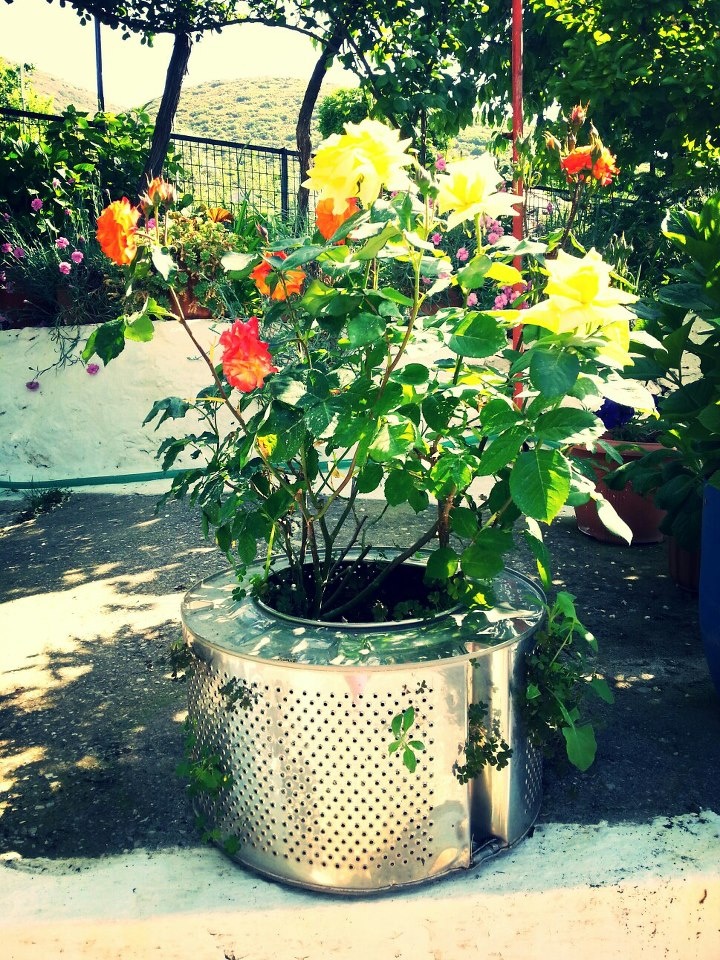
A washing machine drum looks industrial until you see what people make from it: fire pits, side tables, pendant lights, planters, laundry baskets that already have perfect drainage holes. The perforated stainless cylinder is strong, weather-tolerant, and oddly elegant once it leaves the appliance shell. Repurposing one is a classic upcycle project—but it is also metalwork with sharp edges, possible rust, and, if you start from a complete machine, electrical and mechanical hazards.
This guide covers practical drum projects, how to source and clean a drum safely, which builds suit beginners, and when you should not DIY. Treat “easy weekend project” claims with caution: the craft ideas are real, and so are the risks.
Safety first: edges, rust, and electricity
Sharp edges. Factory drums have perforations and cut rims that can slice skin. After you separate a drum from a machine—or receive a salvaged one—inspect the rim, spider/back plate area, and any sheared screws. Deburr with a metal file, flap disc on an angle grinder (eye and ear protection, gloves), or have a metal shop round the rim. Cover finished edges with a rubber trim strip or a wood collar when the piece will be near hands, kids, or pets.
Rust and residues. Stainless drums resist rust better than painted mild steel, but detergent film, mineral scale, and surface rust still appear. Scrub with a nylon brush, warm water, and a degreaser safe for your finish plans. For light rust, a rust remover or fine abrasive can help; rinse thoroughly. Do not use a drum that held unknown chemicals or shows deep pitting if it will hold food, drinks, or open flame near people.
Electrical and mechanical. Never cut into a washing machine that is still plugged in. Unplug, and if you are not sure the machine is safely de-energized, stop. Capacitors and wiring are not DIY playgrounds. Prefer buying a drum already removed from appliance recyclers, repair shops, or scrap yards. Removing a drum yourself means dealing with heavy tubs, counterweights, drive systems, and sometimes sealed bearings—work that can injure backs and fingers. If the machine still runs and someone needs a washer, do not destroy a functional appliance for a planter.
Fire and heat. Stainless fire pits radiate serious heat. Keep them off wooden decks unless you use a rated pad and follow local fire rules. Never burn treated lumber or trash. Have water or an extinguisher nearby. Lights that put bulbs inside a drum need proper lamp parts, strain relief, and grounding where required—do not jury-rig cord through a sharp hole without a grommet and listed components.
When not to DIY
- You lack basic PPE (gloves, eye protection) or a way to file sharp metal.
- The only available drum is heavily rusted through, oily with unknown residues, or deformed.
- The project involves house wiring and you are not comfortable with electrical code basics—hire an electrician for hardwired pendants.
- You want a fire feature on a balcony where open flame is banned or unsafe.
- Kids will climb on the finished piece and the drum is tall/unstable without a bolted base.
- Removing the drum would require cutting a machine you cannot safely lift or dispose of.
Skipping a project is smarter than an ER visit or a deck fire. Buy a ready-made metal fire bowl or planter if the salvage path is messy.
Sourcing a drum
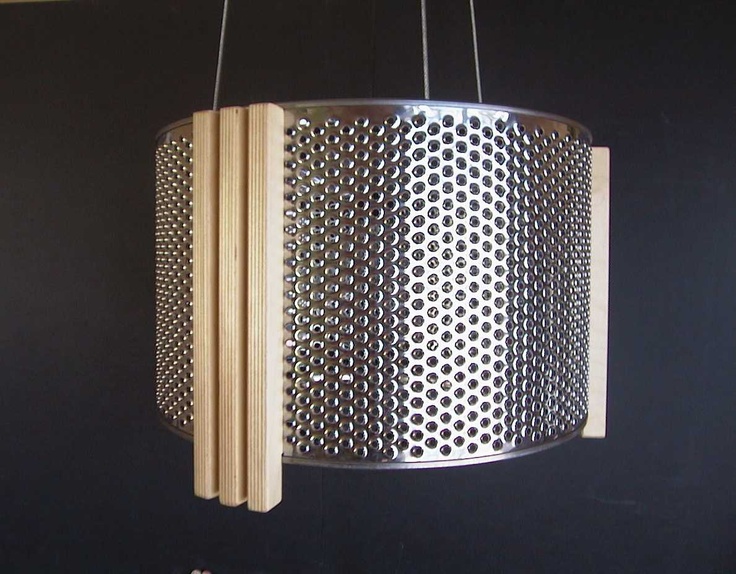
Ask appliance repair shops, scrap yards, and municipal recycling centers whether they set drums aside. Confirm the material: stainless is preferred for outdoors and fire. Measure diameter and depth so your tabletop, plant, or pit plan fits. Bring gloves and a vehicle that can handle weight—drums are awkward and heavier than they look in photos.
Budget time for cleaning before design day. A greasy drum will reject paint and look unfinished outdoors. Dry completely after washing to limit flash rust on any non-stainless parts you keep (bolts, back plates).
Project ideas that suit real homes
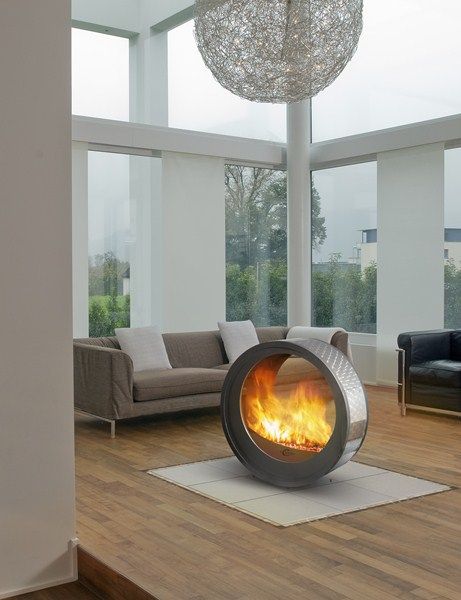
Fire pit. Set the drum open-side up on a non-combustible base: gravel, concrete pavers, or a metal stand that lifts airflow. Some builders add a simple steel ring or leave the perforated walls as-is for a lantern effect. Keep seating several feet back. Extinguish fully before leaving. Check local open-burn rules.
Side table or stool base. Cap the drum with a round wood top larger than the rim so edges are covered. Secure the top with brackets from underneath, or nest a plywood disc inside for support then screw through. Level the drum first; uneven scrap metal rocks. For a stool, verify weight capacity and add a non-slip foot ring.
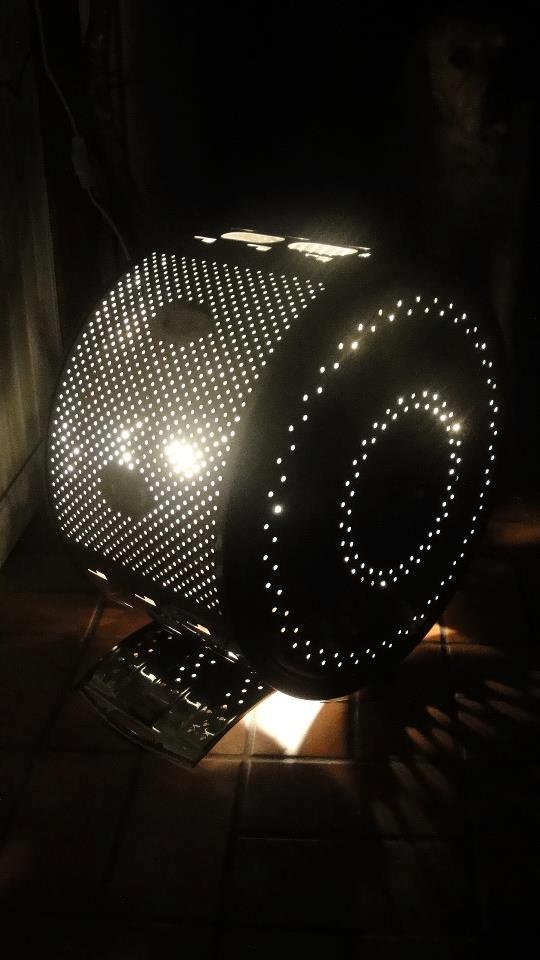
Pendant or floor lamp cage. The perforations cast dotted light patterns. Use a UL-listed (or local equivalent) pendant kit, protect the cord where it passes metal, and hang from a rated ceiling box—not a drywall anchor alone. LED bulbs run cooler than old incandescents, which matters inside a metal cylinder. Floor-lamp versions need a stable weighted base so the drum cannot tip.
Planter. Line with landscape fabric if you want soil to stay put while water drains through the holes. Or drop in a plastic nursery pot and use the drum as a cachepot. Elevate slightly so drainage does not stain a deck. Herbs and trailing plants look especially good against stainless.
Storage basket. For towels, balls of yarn, or kindling, a cleaned drum with filed edges and optional fabric liner works indoors. Add felt pads underneath to protect floors.
Basic build sequence
- Source a drum already removed when possible.
- Clean, degrease, dry.
- File and protect all touchable edges.
- Decide orientation (open up, open down, on its side) and stability needs.
- Add wood tops, lamp parts, stands, or liners with mechanical fasteners—not hope and hot glue alone.
- Test outdoors or in a garage before placing in a finished room.
Paint is optional. Bare stainless ages into a workshop-modern look. If you paint, use a primer made for metal and a topcoat rated for the environment (heat-resistant paint only where temperatures demand it; never assume craft spray paint survives a fire pit).
Outdoor placement tips
Stainless handles weather better than painted steel, but wind can tip tall narrow drums. Wider bases or bolted stands help. In freeze-thaw climates, empty planters that could trap ice against thin metal. Keep fire pits away from fences, eaves, and dry brush. Ash disposal belongs in metal containers, not paper bags near the house.
Honest time expectations
Gluing a wood round onto a clean, already safe drum might take an afternoon. Pulling a drum from a full machine, cutting, grinding, wiring a lamp, and finishing a tabletop is a multi-day project with disposal logistics. Plan for scrap plastic, concrete counterweights, and wiring waste—recycle responsibly rather than leaving an eviscerated washer on the curb.
If you only try one idea, start with a planter or storage drum: no flame, no house wiring, maximum use of the existing perforations. Once you trust your edge finishing and the piece feels stable, you can decide whether a fire pit or pendant is worth the extra safety steps. The best upcycled drum in a backyard is the one that stays upright, stays cool enough to walk past, and never surprises you with a cut finger.

Comments
Continue reading
Upcycle Ideas for Old Doors
Turn surplus doors into headboards, benches, tables, shelves, and screens—prep tips, project ideas, and finishes so salvage wood gets a solid second life at home.
13 Creative Ways to Repurpose Wood Pallets at Home
Planters, coffee tables, lounge bases, headboards, compost bins, and more—thirteen practical pallet DIY projects with safety and finishing notes.
Decorate with Old Wooden Crates: Shelves, Tables, and Storage
Prep sound crates, then turn them into stacked shelves, coffee tables on casters, entry benches, planters, and vertical storage without buying faux-distressed furniture.