
DIY Painted Mugs: Materials, Techniques, and Curing Tips
A hands-on guide to custom mug painting—paint pens, dips, chalkboard bands, oven curing, and care habits that help designs last.
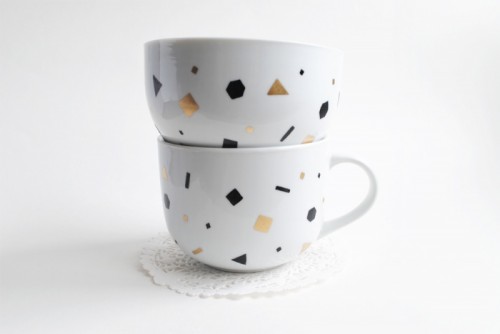
Custom painted mugs are one of the most forgiving DIY gifts: the canvas is cheap, the tools are familiar, and a finished cup still has a job after the craft session ends. Whether you want confetti speckles, a Sharpie illustration, a chalkboard band, a dipped color block, or a simple gold rim, the same core sequence applies—choose a clean ceramic surface, apply a design that can survive washing, cure it properly, then use the mug with realistic expectations.
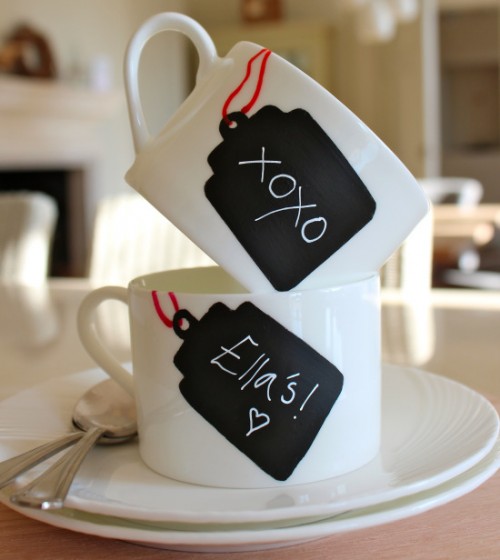
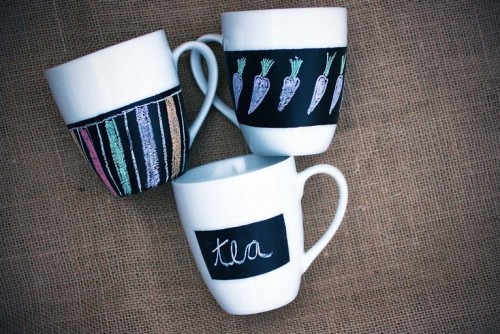
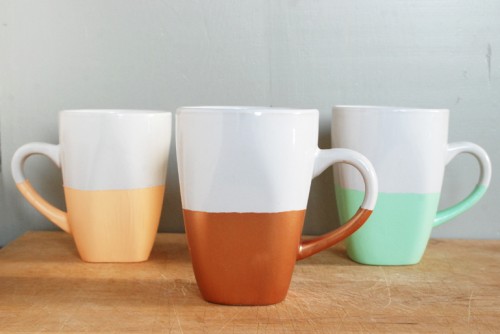
This guide walks through materials, design approaches, curing methods, and common failure points so you can make mugs that look intentional rather than temporary party props. The images below show the range of styles people usually chase: playful pattern, line drawing, dipped color, and chalkboard surfaces.
What you need before you paint
Mugs. Start with plain ceramic or porcelain blanks from a thrift shop or housewares aisle. Smooth, glossy white or cream surfaces show color cleanly. Avoid heavily textured embossing if you want crisp lines. Check that the mug is dishwasher-safe in its original form; that does not guarantee your paint will be, but it suggests a durable glaze.
Cleaners. Wash with hot soapy water, then wipe with isopropyl alcohol to remove oils from manufacturing and handling. Fingerprints are the quiet enemy of adhesion.
Mark-making tools. Oil-based paint markers (often sold as permanent paint pens) behave better on glaze than ordinary water-based craft markers. Ceramic paints and enamel paints designed for glass/ceramics are stronger for larger filled areas. Metallic paint pens work for rims and small accents. Chalkboard paint is a separate system for writable bands.
Masking. Painter’s tape, washi tape, vinyl stickers, and rubber bands help create dips, stripes, and negative shapes. For confetti or speckles, a toothbrush or stiff brush can flick diluted paint.
Curing setup. Many DIY mug methods rely on oven baking to heat-set paint. You need a clean oven, a baking tray, and patience for slow heat-up and cool-down. Air-dry-only paints exist, but heat-set systems are the usual path for drinkware people hope to reuse.
Sealer (optional). Some makers add a clear dishwasher-safe Mod Podge or ceramic sealer over cured designs. Sealers can help, but they also change sheen and can fail if applied over uncured paint. Read the product label and test on a spare mug first.
Design ideas that actually suit a mug
A mug is held, sipped from, and washed. Designs that wrap the belly succeed more often than tiny details parked under the handle where hands never see them. Keep the lip area mostly clear so paint does not meet mouths directly—especially important for gifts and children’s cups. Leave the interior alone unless you are using a product explicitly rated for food contact on inner surfaces; most craft paints are for exterior decoration only.
Confetti and speckles. Flick contrasting dots over a masked or freehand field. Vary size so the pattern feels lively. Work over paper so your table survives.
Line illustrations. Simple motifs—stars, botanicals, handwriting, geometric repeats—suit paint pens. Sketch lightly with a washable pencil or chinagraph if you need guides, then ink with confident strokes. Mistakes on glossy ceramic often wipe away with alcohol before curing.
Dip-dye blocks. Tape a hard horizon line, invert the mug, and paint or dip the lower third in a solid color. Gold or white over color, or color over white, both read modern. Remove tape while paint is still slightly tacky for a cleaner edge.
Chalkboard bands. Paint a rectangle or wrap-around strip with chalkboard paint, cure as directed, then season the surface with chalk before first use. These mugs are interactive: names, jokes, daily notes. They need gentler washing than fully sealed graphic mugs.
Typography. Short words beat paragraphs. Choose a letter style you can repeat consistently. Guidelines drawn around the mug help keep baselines level.
A reliable paint-and-bake workflow
- Prep. Wash, dry, alcohol-wipe. Handle the mug by the handle or interior afterward.
- Plan. Decide which side faces out when the handle is in a right-handed or left-handed grip. Mark that “front” mentally before you start.
- Apply. Work in thin layers. Thick paint chips. Let layers dry to the touch between coats when filling large areas.
- Correct early. Before baking, mistakes usually lift with alcohol or a craft knife edge. After baking, fixes are harder.
- Bake (when your paint system calls for it). A common approach for oil-based paint markers: place mugs in a cold oven, heat to about 350°F / 175°C, hold for 30 minutes, then turn the oven off and let mugs cool completely inside before moving them. Always follow the specific paint brand’s instructions when they differ—temperature and time are chemistry, not folklore.
- Rest. Many makers wait 24–72 hours after cooling before the first wash. Rushing this step is a frequent reason designs peel.
- Wash gently at first. Hand-wash with a soft sponge. Even when a tutorial claims dishwasher safety, treat DIY paint as hand-wash-only until you have tested a sacrificial mug through several cycles.
If you are using ceramic enamel paints instead of markers, follow that product’s cure chart exactly. Some systems need longer bakes or multiple thin firings of the paint layers. Do not invent a hybrid method that mixes incompatible brands on the same surface without a test piece.
Technique tips that raise the finish
Steady the mug. Fill it with dry beans or rice in a bowl so it does not roll while you draw. Or work with the mug upside down on a non-slip mat for rim and dip work.
Rotate, don’t stretch. Turn the mug toward your hand instead of dragging your wrist around the curve. Curves exaggerate shaky lettering.
Mind the handle junction. Paint that pools where handle meets body looks careless and chips first. Feather that zone.
Metallics need opacity. Gold and silver often need two passes. Let the first dry before the second or you will pull color off.
Chalkboard surfaces. After curing, rub the entire board area with the side of a chalk stick, then erase. This seasons the surface so first written lines do not ghost permanently.
Sets and gifts. Paint in batches with a shared palette so a gift set looks related. Wrap finished mugs with a note: “hand-wash, exterior decoration only.” Recipients appreciate honesty more than a surprise chip in week two.
What usually goes wrong
Peeling after a week usually means poor degreasing, paint that never fully cured, or aggressive dishwashing. Fading can mean water-based ink that was never meant for repeated abrasion. Cloudy sealers often mean the sealer was applied too thickly or over paint that was still outgassing. Uneven dips come from thick paint and hesitant pouring—practice on a jar first.
If a design fails, do not assume every mug method is doomed. Strip what you can, or retire the mug as a pencil cup and start a cleaner blank. DIY ceramics reward iteration more than perfectionism on the first try.
A short project checklist
- Plain ceramic mug, washed and alcohol-wiped
- Oil-based paint markers or ceramic paint rated for the surface
- Tape or masks if you want sharp geometry
- Oven cure per product instructions (or air cure if specified)
- Cool-down and rest period before washing
- Hand-wash habit for longevity
- Clear note to gift recipients about care
Paint one mug for yourself before you promise a wedding party set. Learn how your particular paint behaves on your particular blanks. Once that combination works, scale up with confidence—confetti for birthdays, chalkboard for desks, dipped blocks for kitchen shelves, line drawings for quiet gifts that still feel personal. Creativity here is less about inventing a brand-new craft and more about executing a clean surface, a clear idea, and a cure you do not rush.

Comments
Continue reading
15 Adorable DIY Father’s Day Gifts Worth Making
Fifteen handmade Father’s Day ideas—from etched glasses and felt sleeves to a leather-handle box and grill cover—chosen for use, not just wrapping-paper moments.
Easy Cheap Mason Jar DIY: Luminaries, Terrariums, Lamps, Dispensers, and Vases
Repurpose mason jars into luminaries, terrariums, drink cups, lamps, ornaments, soap dispensers, herb planters, and vases with simple, low-cost steps.
How to Refashion Old Jeans at Home
Practical DIY jean makeovers—paint and prints, rips and patches, lace inserts, cut-offs, bleach, and dye—with tools, steps, and a weekend plan.